
 6 hours ago
3
6 hours ago
3 
The post 27 Ways to Make Your Christmas Tree Look Full Without Buying More Ornaments appeared first on Penny Pinchin' Mom.
You unpack the ornament box and realize it covered a six-foot tree just fine last year, but this year’s seven-footer looks sparse and bottom-heavy. The instant solution feels obvious: buy more ornaments. I stood in Target last December holding a $30 box of glass balls I didn’t need, convincing myself they’d fix the bare spots.
They won’t. What makes a tree look full isn’t quantity. It’s depth and placement. Push ornaments inside the branches instead of hanging them on the tips, wrap lights around each branch instead of draping them across the front, cluster ornaments in threes to create visual weight, and tuck floral picks into gaps for natural-looking fill. You’ll have a designer-looking tree using exactly what you already own.
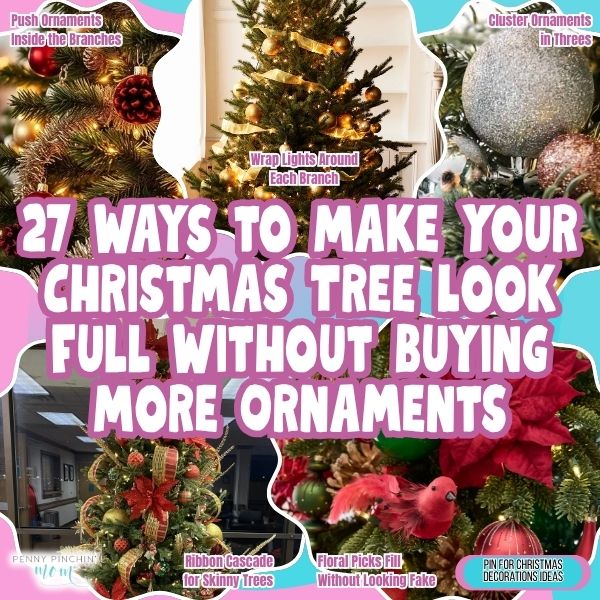
1. Push Ornaments Inside the Branches

Your tree looks bare because everything hangs on the surface. Walk around it and shove ornaments three to six inches back into the branches so they sit deeper. This creates layers you can see through and makes the tree look full even with the same number of ornaments. Start with your cheaper plastic balls since they’re lighter and the branches hold them better. Takes maybe fifteen minutes for a seven-foot tree. The trick is to push them far enough that you see branch tips in front of the ornament.
2. Wrap Lights Around Each Branch
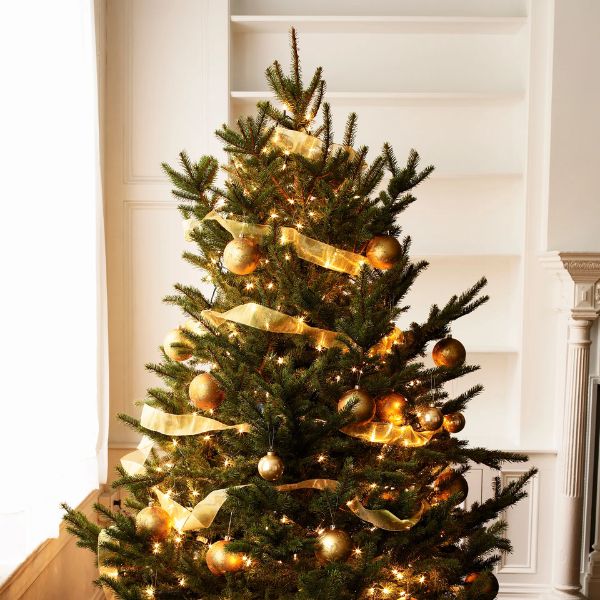
Stringing lights across the front of the tree like a net leaves the sides and back dark. Instead, wrap the strand around individual branches, working from the trunk outward. For a seven-foot tree, you’ll need around 700 lights total, which sounds like a lot, but you probably already own multiple strands. This takes about thirty minutes, and the tree glows from every angle instead of just straight-on. Start at the bottom and work up so the plugs end at the top where the cord drops down the back.
3. Cluster Ornaments in Threes
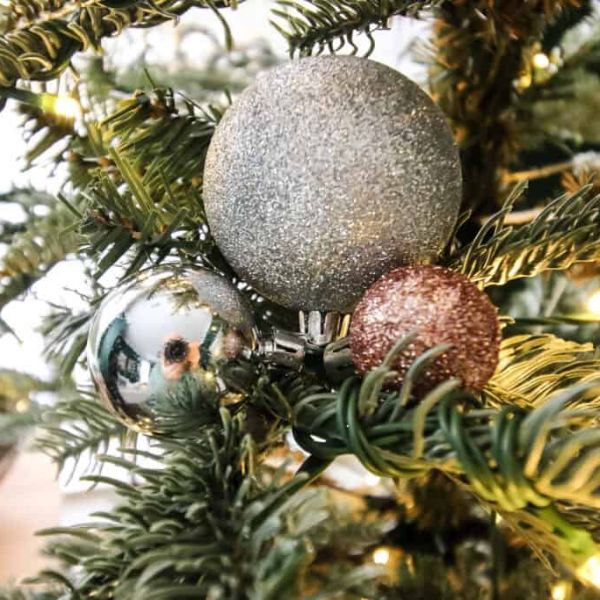
Spacing ornaments evenly around the tree makes it look like a craft project. Group them in clusters of three instead, with different sizes in each group. Put a large ball with two smaller ones right next to it, then leave some branches bare. This mirrors how designers fill trees and uses the exact ornaments you already have. The empty spots between clusters make the decorated areas look intentional instead of skimpy. Move clusters around until they form a triangle pattern when you step back.
4. Ribbon Cascade for Skinny Trees
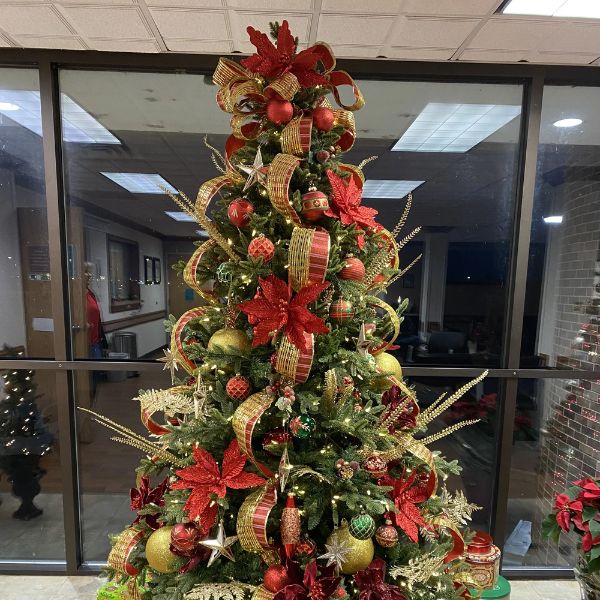
If your tree is narrow, vertical ribbon looks better than horizontal wrapping. Cut six-foot lengths of wired ribbon and tuck one end deep into the top branches, letting it cascade down and slightly spiral as it falls. About ten pieces work for a seven-foot tree, which means one $5 spool from the craft store covers it. The ribbon fills vertical gaps without adding width and catches light as it twists. Fluff each ribbon after you place it so it doesn’t hang flat.
5. Floral Picks Fill Without Looking Fake
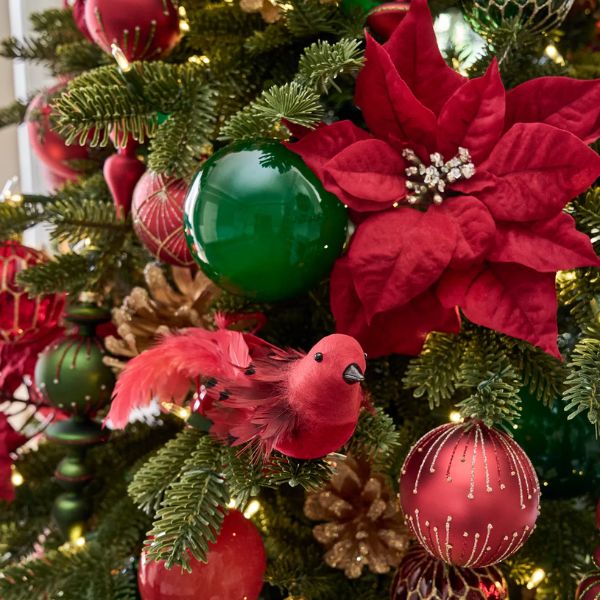
The Christmas section at craft stores sells stems of berries, pine cones, or frosted branches for around $2 each. Stick eight to ten throughout your tree to fill holes. They look like part of the tree itself instead of obvious filler. Grab them after Christmas when they hit seventy-five percent off and store them with your ornaments. The glittered pine cone picks work best because they add texture your ball ornaments can’t create. Bend the wire stems to hook them deep into the branches.
6. Graduate Ornament Sizes Bottom to Top
Put your largest ornaments on the bottom third of the tree, medium ones in the middle, and smallest at the top. This creates the illusion of a fuller tree because the eye expects things to get smaller as they go up. A friend who worked retail Christmas shared this with me years ago, and it made my half-empty tree look intentionally styled. It also solves the problem of heavy ornaments pulling down upper branches. Sort your ornaments by size before you start decorating instead of grabbing randomly from the box.
7. Bedsheet Snow at the Base
A white flat sheet or quilt batting spread under the tree covers the stand and creates a winter scene that draws the eye down and away from sparse upper branches. This runs maybe $5 if you buy a yard of batting at the fabric store, or free if you repurpose an old sheet. Tuck it around the base and let it puddle naturally instead of smoothing it flat. It also catches fallen needles if you have a real tree. The white reflects your tree lights back up and makes the whole bottom section glow.
8. Tree Collar Instead of a Skirt
A tree collar sits around the base like a decorative bucket and looks more polished than a fabric skirt for about the same cost. You can make one from a $12 galvanized tub from the hardware store by cutting out the bottom. The metal ones at Target run about $25 but nest for storage. Collars hide the stand completely and give you back all that floor space a skirt takes up. They also make a sparse tree look like a design choice instead of a ran-out-of-ornaments situation.
9. Horizontal Ribbon Wrap for Full Trees
When your tree is already fairly full but needs something extra, wrap wide ribbon horizontally around it like a barber pole. Use three to four wraps spaced evenly from bottom to top. One spool of four-inch wired ribbon runs about $8 and does a whole tree if you don’t pull it tight. This works better on fuller trees because you need branch density for the ribbon to rest on. Tuck the ends into the back branches instead of tying bows, which look fussy.
10. Ornament Hooks Facing In
This sounds too simple to matter, but it changes everything. Turn your ornament hooks so they grip the branch instead of just hanging over it. The ornament sits closer to the tree and won’t slide toward the tip of the branch, which creates that bottom-heavy look. When my kids were little and helped decorate, they hung everything on the very ends and the whole tree drooped. Twenty minutes of rehooking them farther in made the tree look twice as full. This costs nothing and fixes the problem immediately.
11. Cut Garland Into Filler Branches
A six-foot length of basic greenery garland from the dollar store costs around $3 and has maybe twenty stems you can cut apart. Stick these stems into any bald spots on your tree to fill gaps. Real garland works better than tinsel because it has dimension and blends with the tree. This works especially well on the back side where the tree sits against the wall and always ends up thinner. Cut the garland into six-inch pieces and bend the wire to hook deep into an existing branch.
12. Layer Different Light Colors
If you have both white and colored light strands, use them together instead of picking one. Put white lights deeper in the tree and colored ones toward the front. This creates depth the same way pushing ornaments back does. Your tree looks fuller because something is glowing at multiple levels. Mixing the strands looks intentional if you distribute both types evenly top to bottom. The varied light temperatures create dimension you can’t get with a single color.
13. Tuck Greenery Clippings Into Sparse Spots
When you trim your real tree to fit the stand, save those cut branches. Drill a small hole in a wine cork, stick the branch cutting in it, and nestle the cork into sparse areas of the tree. The added greenery fills holes for free, and you can’t tell it’s a separate piece. This works with artificial trees too if you have an old tree in the garage or can grab clearance branches after Christmas. Each cutting lasts the whole season if your house isn’t too warm.
14. Statement Topper Draws Eyes Up
A large topper makes people look up instead of scanning the middle of your tree where it might be sparse. A $6 glittered star that’s fourteen inches across can completely change how full a tree looks. The topper doesn’t have to match your ornaments perfectly. Something oversized or unexpectedly fancy works better than a small coordinated one. It also means you need fewer ornaments near the top since the topper fills that whole section.
15. Candy Canes as Filler
A box of twelve candy canes costs around $2, and they’re shaped to hook onto branches. Hang them in the gaps between ornament clusters to add red and white stripes that catch light. This works especially well if your ornaments are all one color and the tree looks flat. Kids love hanging these, so it’s an easy way to get help finishing the tree. The candy canes also give you an excuse to leave some branches bare since peppermint sticks look better with space around them.
16. Fluff Every Single Branch
Artificial trees get compressed in storage, and the branches flatten. Spend thirty minutes bending each branch tip up and fanning out the needle clusters. This adds inches to your tree’s width and makes it look full even before you add anything. Do this while watching a movie because it’s mindless but makes a huge difference. Pay special attention to the branches near the trunk since those create the depth that makes ornaments look like they’re floating in greenery instead of stuck to the surface.
17. Pine Cone Clusters at the Base
Gather pine cones from your yard or a park and hot glue them in groups of three to five. Nestle these clusters around the base of the tree on top of your sheet or collar. This draws attention down and makes the tree feel grounded instead of sparse. The brown texture contrasts with shiny ornaments and fills space for free. A quick spray with clear glitter spray from the dollar store, which costs about $1, makes them look intentional instead of like you just brought the outside in.
18. Mesh Ribbon for Quick Fill
Wide mesh ribbon in Christmas colors runs about $5 for a roll, and you can scrunch it into the tree for instant volume. Cut it into two-foot sections and push it deep into gaps so it puffs out around ornaments. This works faster than traditional ribbon because you don’t have to wrap or tie anything. The holes in the mesh let light through so it glows instead of creating dark spots. One roll fills a seven-foot tree if you focus on the sparse areas instead of covering everything.
19. Ornament Stacking Creates Depth
Hang a small ornament directly in front of a larger one on the same branch. The layering makes both ornaments more visible and creates the depth a full tree has naturally. Try this with plain red balls in front of patterned ones to make the patterned ones pop. You can stack three ornaments deep on sturdy branches. This uses ornaments you already have and makes each one work harder to fill space.
20. Beaded Garland Wrapped Loosely
A strand of beaded garland from the dollar store costs about $1 and adds sparkle between ornaments without competing with them. Wrap it loosely around the tree so it drapes instead of pulling tight. The beads catch light and create little focal points that make people think there’s more going on than there is. Three strands work well on a seven-foot tree, winding them in a spiral from top to bottom. The key is letting it loop naturally instead of trying to make it perfect.
21. Magnolia Leaves for Elegant Fill
If you have access to magnolia trees, the leaves last weeks after cutting and fill tree gaps beautifully. Tuck them into the branches with the silvery underside facing out for contrast against green. This costs nothing and looks expensive because magnolia leaves have that Southern Christmas feel. They dry out eventually but hold their shape and color through New Year’s. Even five or six leaves scattered through the sparse spots add that high-end designer touch.
22. Copper Wire Stars Between Ornaments
Simple five-pointed stars made from copper wire fill empty spots with handmade charm. A spool of copper wire runs about $4 at the craft store. Twist two ten-inch pieces together and hook them onto branches in empty spots. The copper reflects light and adds a handmade element that makes a sparse tree look intentionally rustic instead of underdone. Each star takes maybe three minutes to make while you watch TV.
23. Add Movement With Feather Picks
White or silver feather picks from the craft store cost about $2 each and add movement to a static tree. Stick six to eight throughout to create visual interest in spots where ornaments would just add more of the same. The feathers catch any air movement and make the tree feel alive. This works especially well if all your ornaments are balls and the tree looks one-note. The texture contrast makes everything else look more intentional.
24. Tulle Puffs Fill Fast
Cut tulle into twelve-inch squares and gather the center to create a puff. Twist a pipe cleaner around the center and hook it onto a branch. Five yards of tulle runs about $3 and makes dozens of puffs. These fill enormous amounts of space quickly and catch light without blocking it. White creates a snowy look, but red or green works too. Each puff takes under a minute to make, and kids can help with this.
25. Cinnamon Sticks Bundled with Twine
Three cinnamon sticks tied together with twine hang like ornaments and smell incredible. A bag of sticks will set you back about $4 at the grocery store and makes eight to ten bundles. They add brown texture, and the scent intensifies when tree lights warm them up. This natural element makes a sparse tree look farmhouse-styled instead of empty. Hot glue a loop of twine to the top of each bundle so they hang straight instead of flopping sideways.
26. Mirror Ornaments Reflect Light
If you have any mirrored or highly reflective ornaments, place them strategically in dark spots where they’ll bounce light around. This makes the tree look fuller because the reflections create the illusion of more ornaments. A set of six mirror ball ornaments runs about $8 after Christmas and works specifically for this purpose. Hang them deeper in the tree where they’ll catch light from all your other ornaments and multiply the sparkle.
27. Battery Fairy Lights in Gaps
Those battery-operated fairy light strands that come in jars cost around $3 at the dollar store. Wind them through the sparsest sections of your tree to add glow without running more cords. The tiny lights fill space visually and make gaps look intentional because they’re clearly a different element than your main lights. Two strands work well on a seven-foot tree, focusing on the back side. The batteries last about three weeks if you turn them off during the day.
Your Tree Looks Amazing With What You Already Have
That box of ornaments you were ready to drop $30 on at Target? You don’t need it. The bare spots you’re seeing aren’t a shortage problem. They’re a placement problem, and you just learned exactly how to fix them.
Start with pushing ornaments inside the branches if you want instant depth; try clustering ornaments in threes if your tree looks flat, or wrap lights around each branch when you need that full glow. Pull out those candy canes collecting dust in the pantry, fluff every single branch like you mean it, scrunch mesh ribbon into gaps for quick volume, or wind beaded garland loosely for sparkle. Watch sparse turn into stunning. You’ve got everything you need to create the tree you’ve been picturing. No Target run required.
The post 27 Ways to Make Your Christmas Tree Look Full Without Buying More Ornaments appeared first on Penny Pinchin' Mom.





 Bengali (Bangladesh) ·
  English (United States) ·